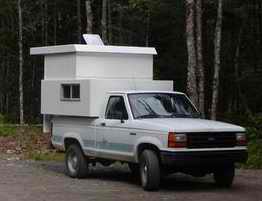
We wanted a small camper for our Ford Ranger Truck it was hard to find something small commercially built with a low enough centre of gravity to use on a 4x4 truck, a type of vehicle where campers are not normally recommended, the only ones available where larger and with canvas sides, not the best of things in bear country. The price of these units was beyond our price range so after some browsing on the internet and stealing the idea for the pop top from This Website and the Compact plans , my thanks goes to the author for the great illustrations of the concept. After that it was of to the workshop.
I made several mistakes on the pop top due to my inability to follow instructions but everything has worked out in the end

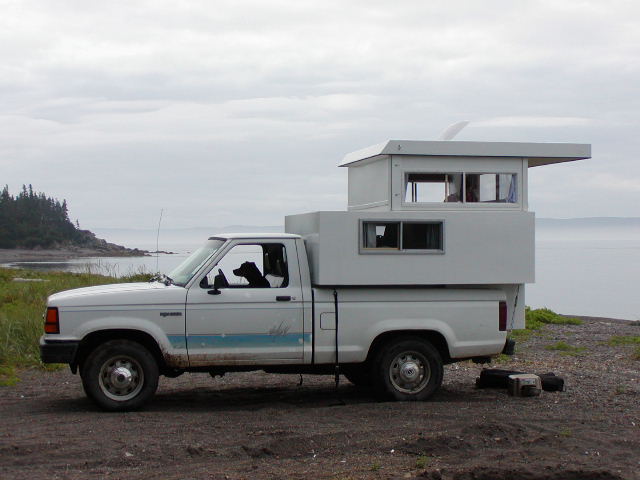
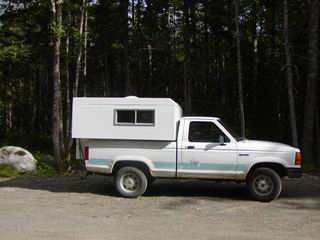
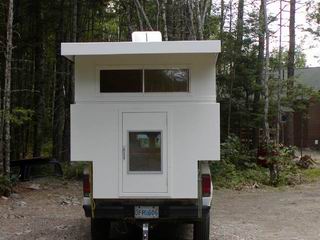
Ready for the road 30 seconds later ready to camp pretty neat!
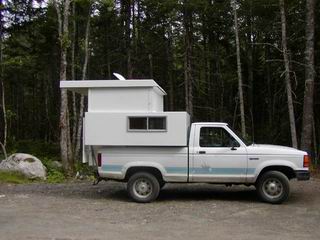
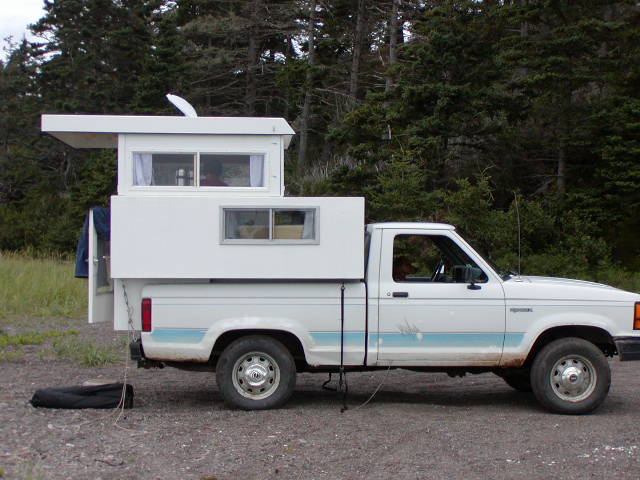
Side view ready for the road . 30 seconds later the top is raised by pushing on the inside with my head and shoulders the first foot is the hardest due to the angle the body is at. Once the top is fully up the two sides are simply flipped up and locked into place. The camper is unfinished at this stage, I plan on putting more windows in the flip up sides.

The camper sticks out 6" from the box. Nice big back window that can be left open in the rain, the top weights about 50lbs and is about as much as I want to lift, I'm on the lookout for ideas to make this job easier.
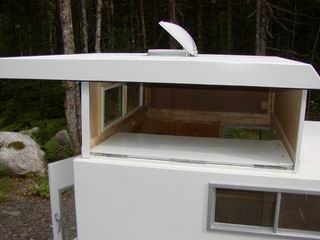
The top partially raised, at the back the side seals against a piece of plywood extending forward from the end of the back piece this wasn't possible at the front due to my biggest mistake. If you look at the top of the right picture you can see the front folding piece is attached with a hinge right on the top, this means that a piece of plywood can't be attached sticking out an inch to the back for the side piece to seal against. It would get crushed against the ceiling as the roof is folded down, the hinge should have been attached 1" down from the ceiling on a piece of wood
The solution was simply a piece of plywood attached to the side piece that can slid forward sealed with foam weather stripping and a couple of wing nuts. It adds a few seconds to the set up time
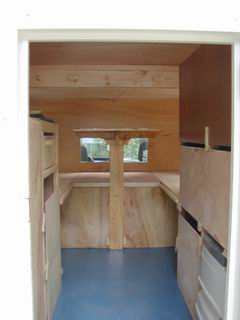 The inside is roughed in and usable at this stage, it will be
completed over the winter right now we want to take advantage of our short
season and go camping.
The inside is roughed in and usable at this stage, it will be
completed over the winter right now we want to take advantage of our short
season and go camping.
There is a dinette forward which folds down into a small double bed 5'9" by 4' across the camper, I'm 5'8" and fortunately we are both small the bed could easily be made longer but I wanted to keep the frontal area of the camper down. At the back we have a small kitchen area with a portable single burner stove and bucket for a sink, on the other side is storage with a porta-potty that slides out for use it's usable with the top down for those roadside stops.
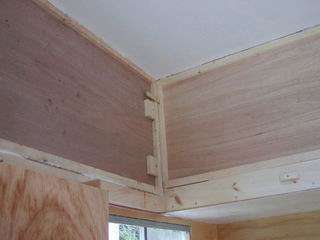
Construction is 2 layers of 1/4" Laun plywood sandwiched with 1" foam, edges and stress points have a 1x1 1/4" spruce core, the bottom is 1/2 spruce plywood, interior cabinets are 1/4" Laun plywood. All joints are glued and either nailed or screwed, epoxy resin is used on any high stress area.
To finish the outside I coated the plywood with epoxy resin, filled sanded and applied 6 coats of enamel paint, the roof had an extra coat of epoxy and glass tape on the plywood seams it then received 3 heavy coats of a rubberized RV roof coating.
I would guess it weights about 300lbs empty, I can just lift the heavy end. Although I did everything I could to keep the weight down it could definitely be made lighter, we have a very limited selection of plywood here, 1/8" plywood could have been used on the inside skin this would probably save an extra 40lbs
Outside dimensions are 6' wide 7' long 3' 10" high with the top down and 6' with the top up. The whole top lifts up and the hinged front and back pieces keep it under control as it lifts, it weights around 50lbs and is about as much weight as I care to lift on a regular bases from the crouched position (perhaps too much as I get older) it was much easier to lift before I fitted the hatch as I could stick my head through the hole and lift with my shoulders from a better position.
I'm open to suggestions for making this task easier several options come to mind including the above idea of a different hatch, another thing we have tried is using a second person and a piece of wood as a lever to lift the roof the first foot or so after that its easy to push it the rest of the way, this works quite well its just a matter of fixing some lift points, for the time being I'm content to push it up all the way. Another option that comes to mind is using a piece of threaded rod and a rechargeable drill to push the roof up, a few details need to be worked out!! push button convenience would be the ultimate goal providing it didn't add too much weight.